Whether you’re an e-retailer making your first investment in inventory or an experienced merchant dealing with a routine resupply, purchase orders — dubbed POs — will be helpful for tracking received inventory.
In Ordoro, you can create POs to restock products in your warehouse. Below we’ll outline how to create and send purchase orders and receive them to increase your inventory.
Topics
- Set up to send purchase orders
- How to create a purchase order (PO)
- How to add items to an existing PO
- How to send the PO to the supplier
- How the PO email appears to your supplier
- How to update the Estimated Delivery Date
- How to receive items and increase inventory
Set up to send purchase orders
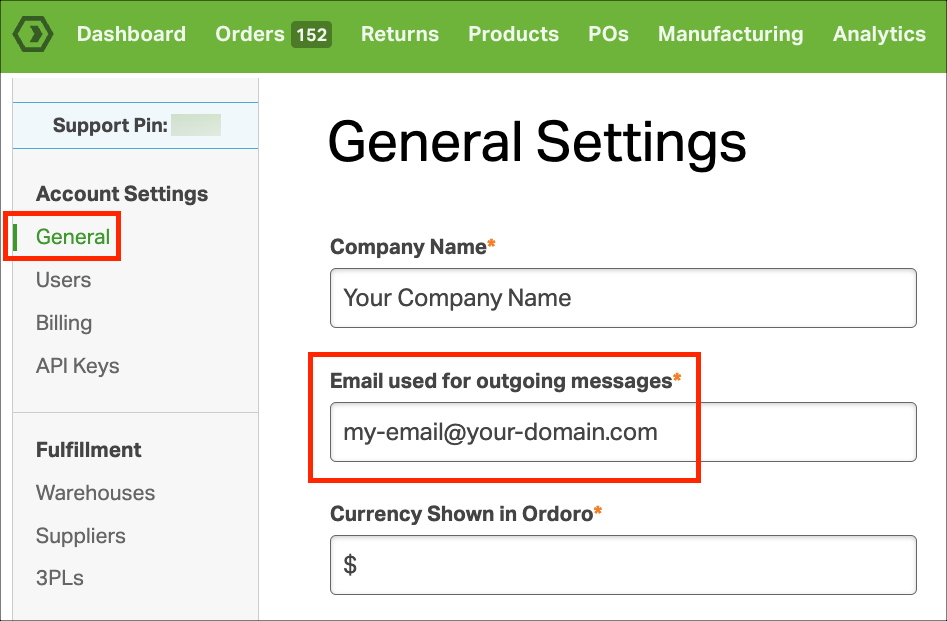
1. Go to Settings -> General and enter the email address the POs will be sent from.
- This email will appear as the From address for POs and tracking emails sent directly from Ordoro.
2. Create Suppliers in your account if you have not done this already. Click here for instructions.
3. Decide if you’d like Ordoro to automatically calculate products’ Weighted Average Unit Cost when you receive a PO. Select the checkbox to enable this feature.
- For details on how the recalculation will happen, see this help article.

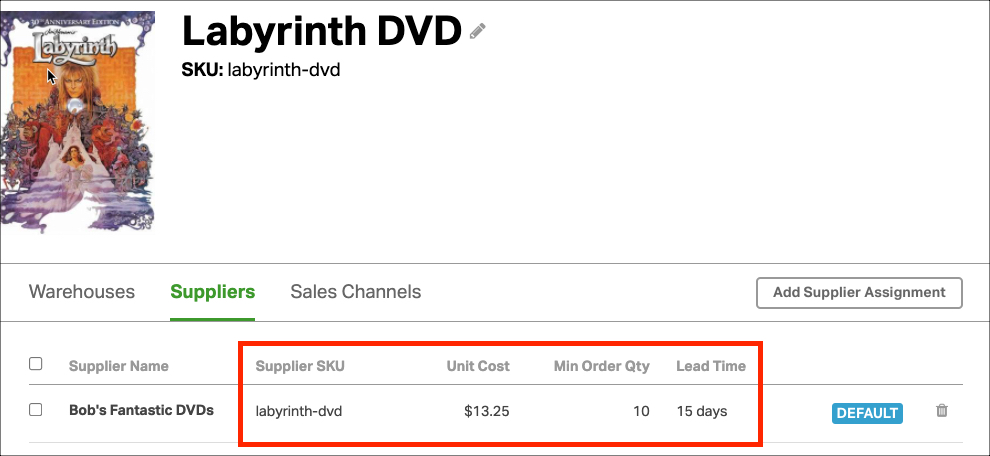
4. Assign suppliers to your products. You can set the unit cost, minimum order quantity, etc. Click the screenshot to expand and click here for instructions.
How to create a purchase order (PO)
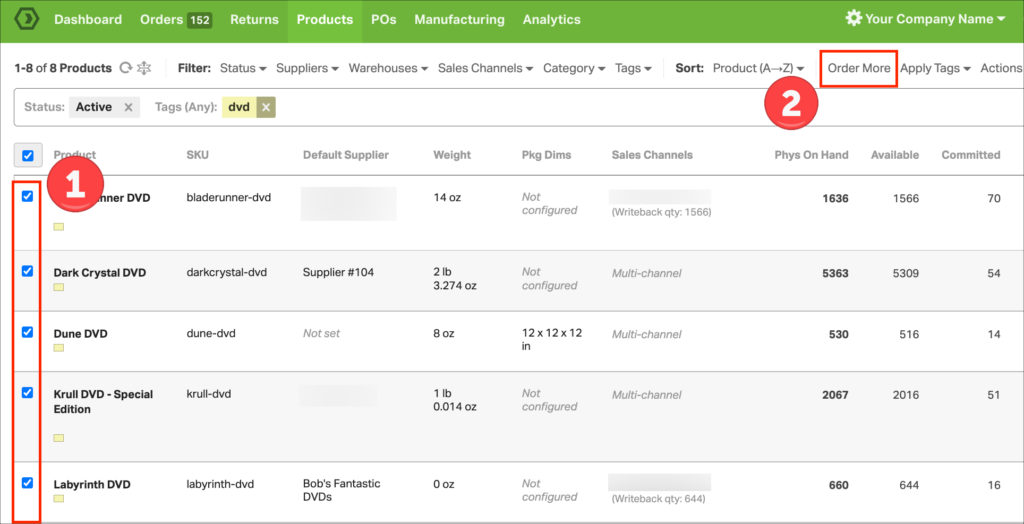
1. Go to the Products tab and select the box next to the product(s) you would like to reorder. You can use the Low Inventory Filter to find your products that need reorder. Click here for details.
2. Select the Order More option.
- Suppose each product has a different default supplier, no problem! Ordoro can create multiple POs at once.
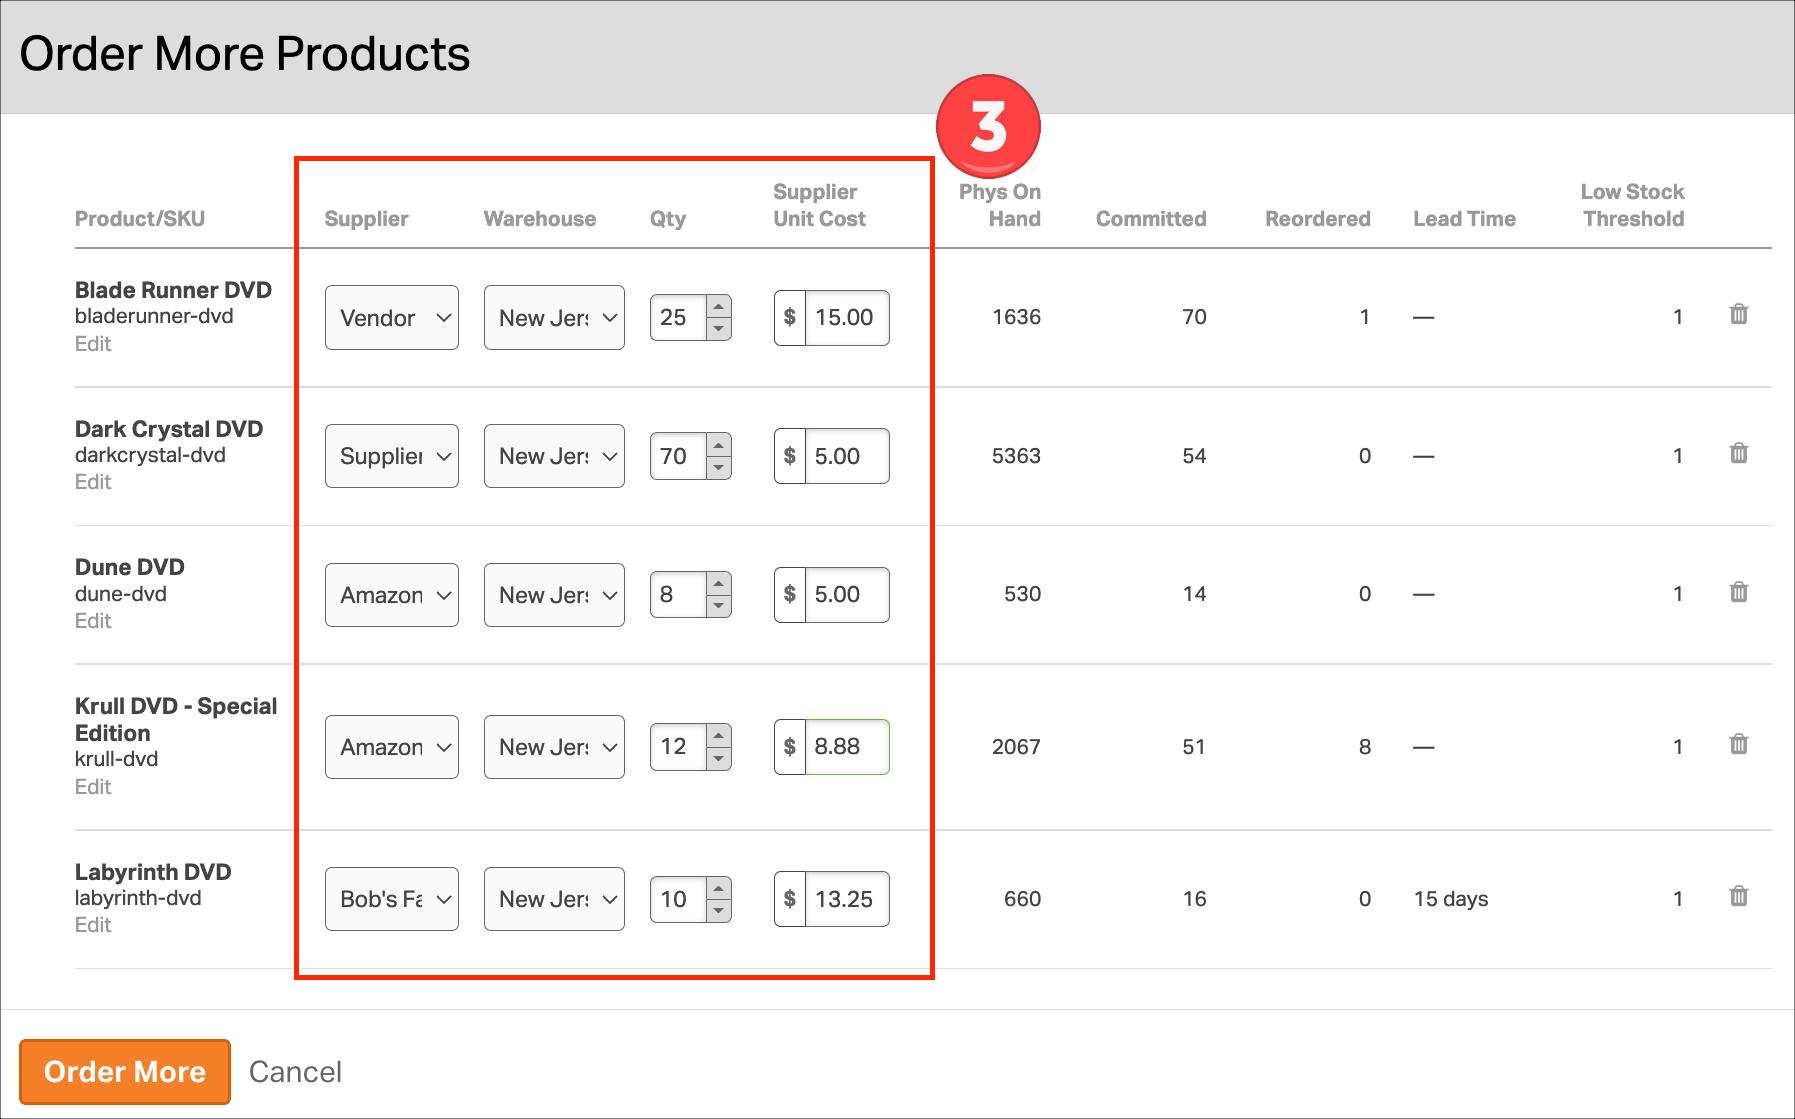
3. A pop-up will appear to set which supplier to reorder from, the warehouse to which you’ll receive the items, the quantity per item, and the unit cost.
- If you’ve already set these values per product, Ordoro will pre-fill the information.
- For example, if a supplier has a minimum order quantity of 10, then it is automatically entered.
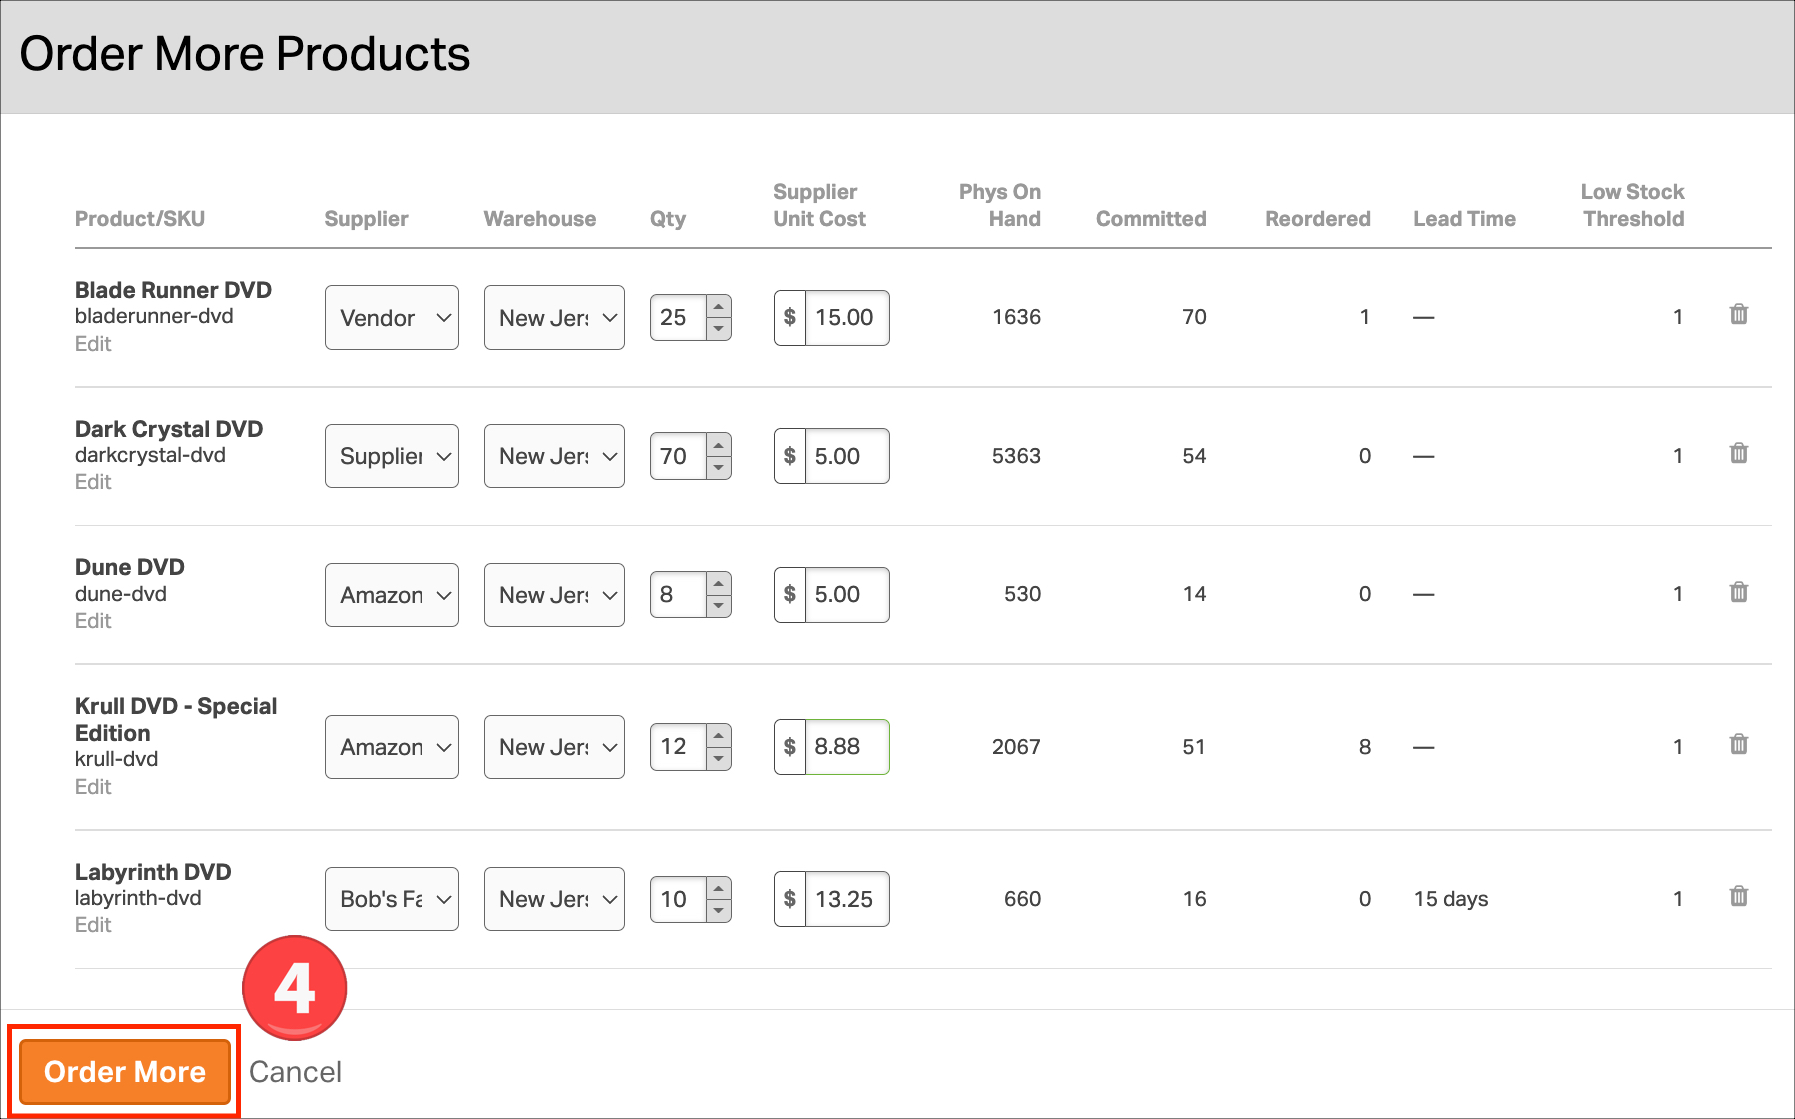
4. Make the requisite changes and then click the Order More button to create draft/unsent purchase order(s).
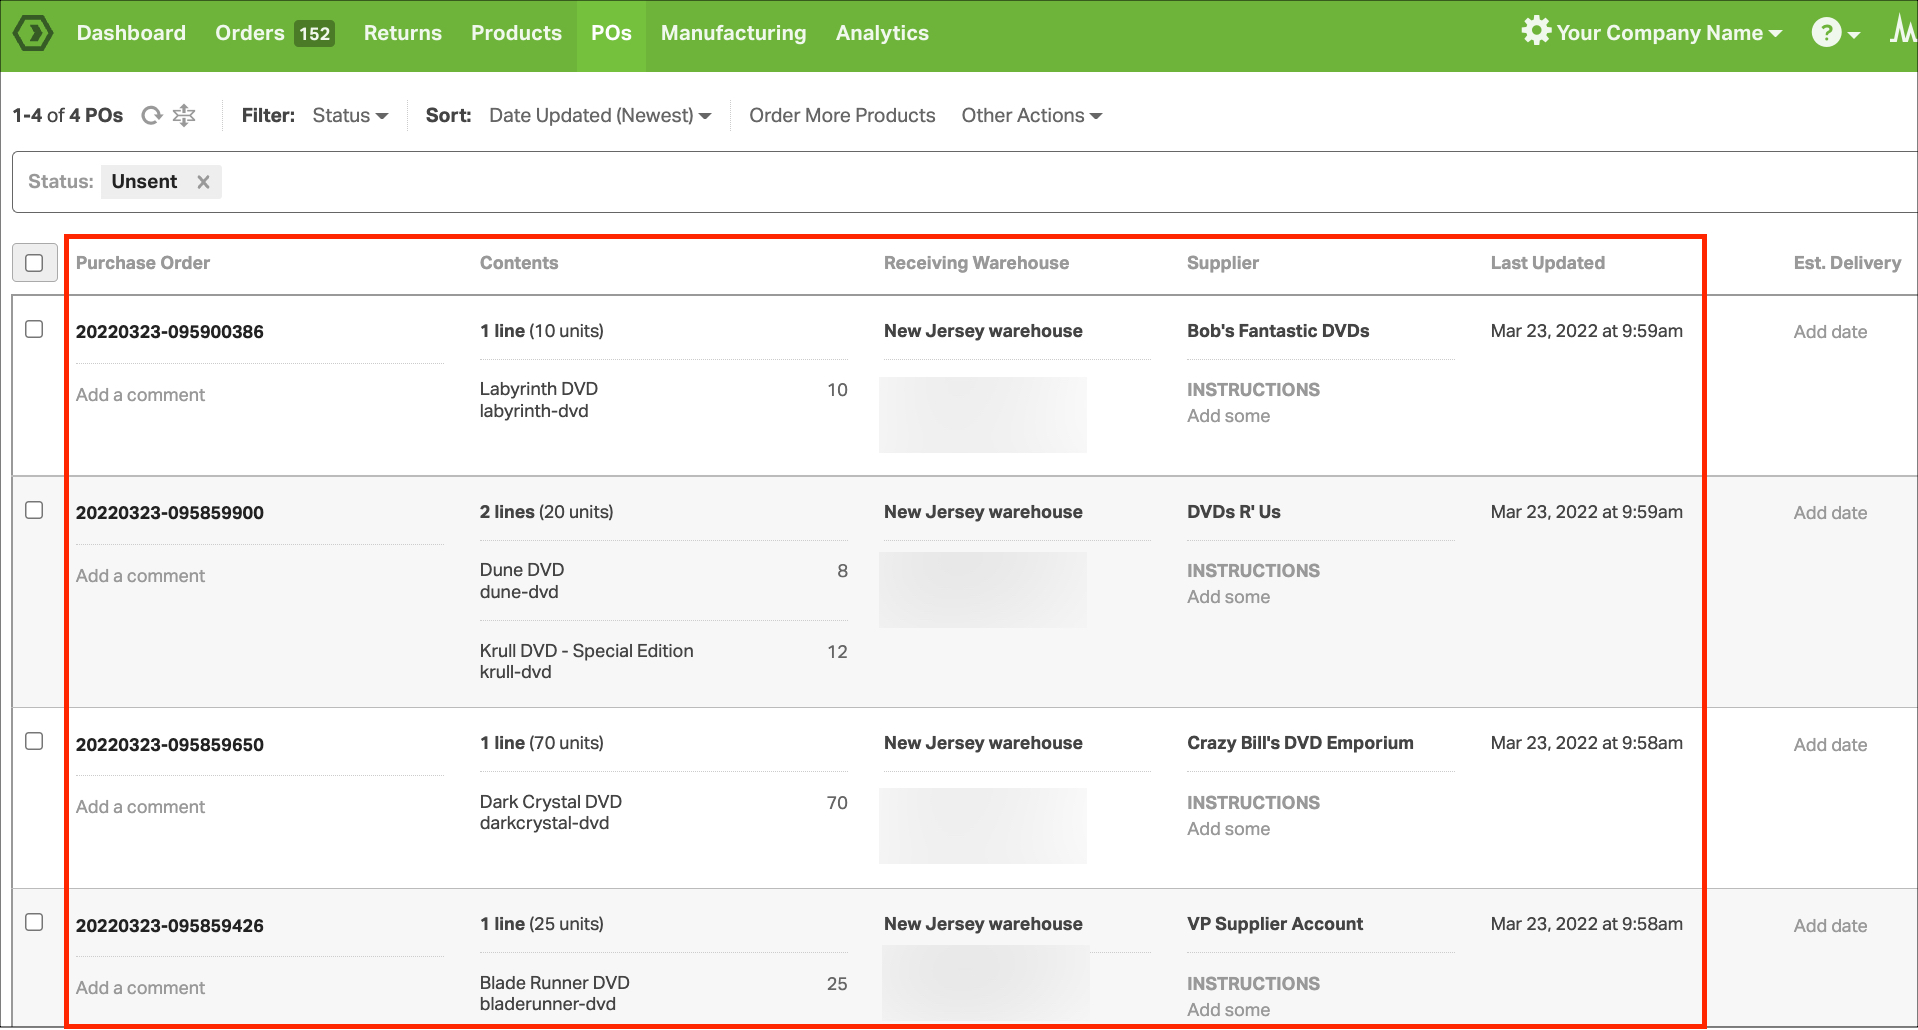
5. Purchase Orders will be created in the Unsent status. Go to the POs tab to view them.
- The PO ID is set as the date and time the PO was drafted. This ID can be changed before it is marked as Sent. Once sent, the PO ID is uneditable.
- In the screenshot below, you’ll notice four separate POs were created. This happened because four different suppliers were selected in Order More.
- You can add tags to your POs to help categorize and filter your POs. Click here for instructions.
How to add items to an existing PO
There may be a PO you’d like to add items. We recommend doing this to Unsent POs only. You can add items to a PO previously emailed to your supplier, but you’ll need to resend and make sure they see the changes.
There are two ways to add items to an existing PO:
Option 1: Add directly to the PO
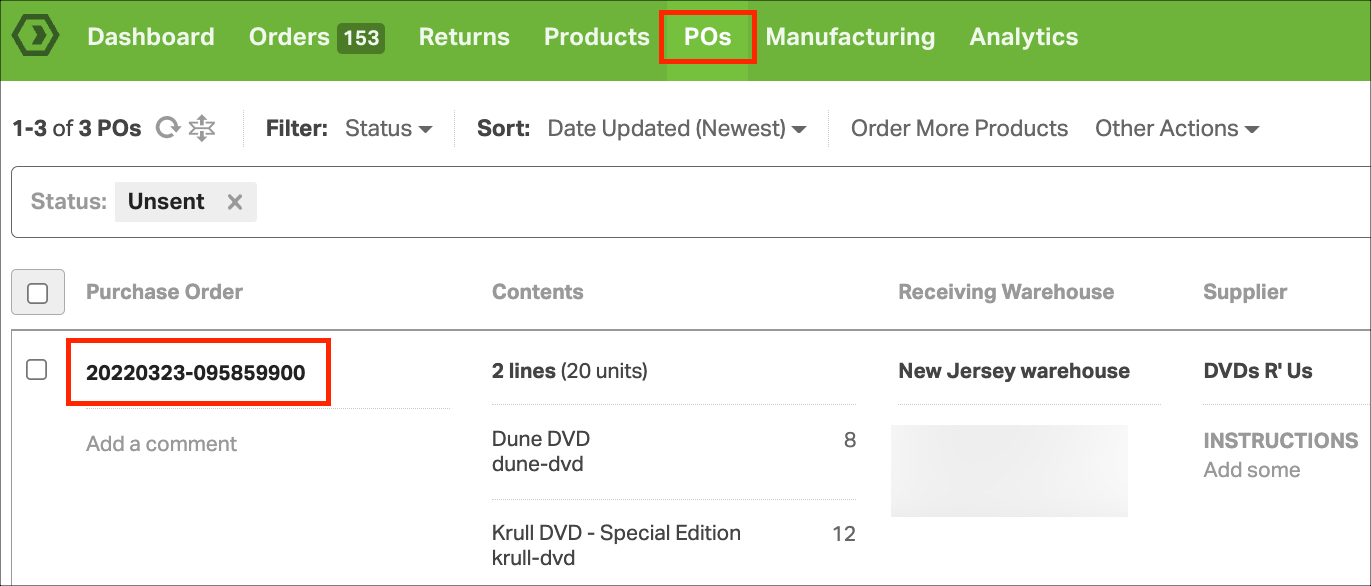
1. Go to the POs tab and click on PO ID to add products. This will take you to the PO Detail page.
2. On the PO Detail page, click Add a Product.
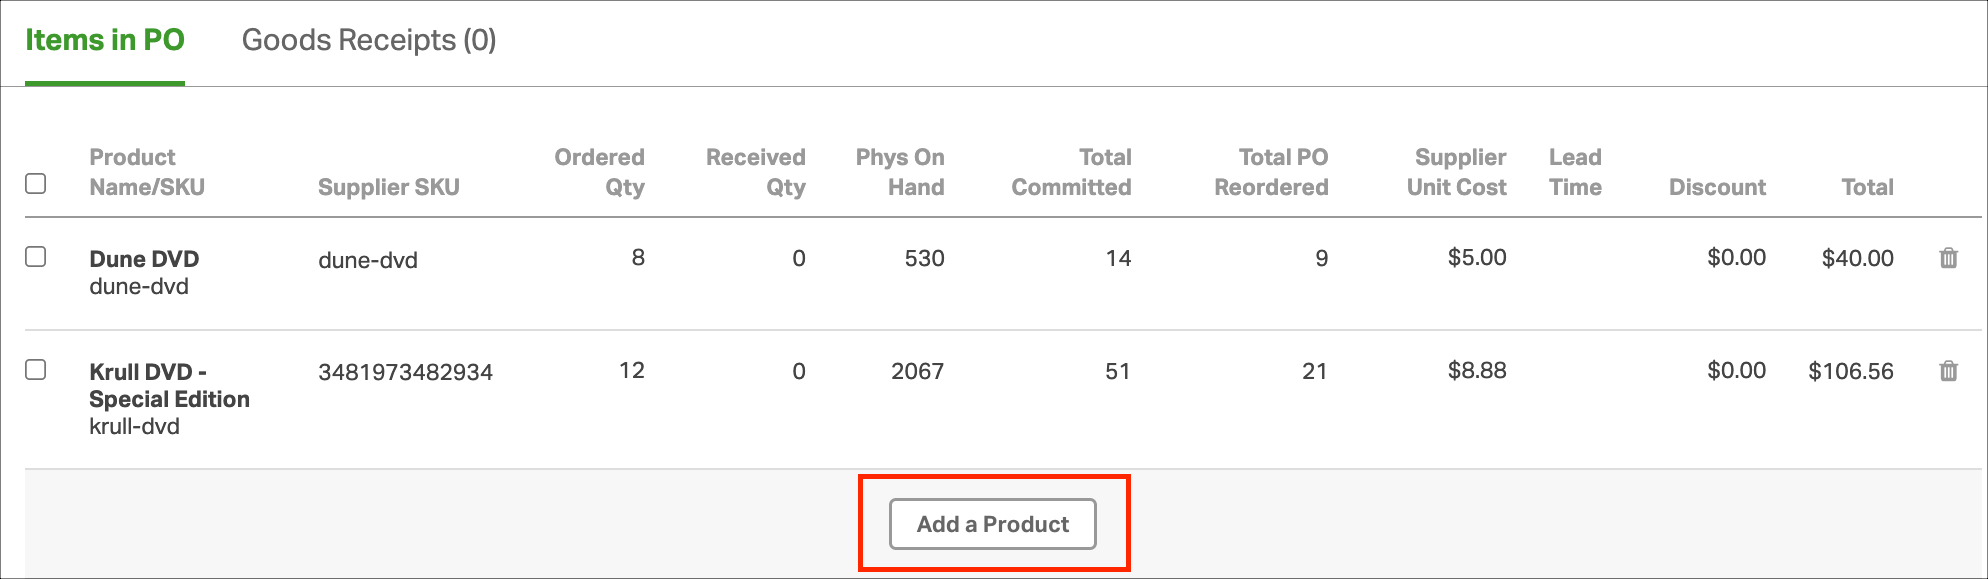
3. To find the item(s), enter the SKU or product name. Enter the quantity, supplier unit cost, and discount. Then click either Save or Create and Add Another.

- If you’ve already set these values per product, Ordoro will pre-fill the information.
Option 2: Add from the Products page
Note: This option will only work if the PO is in the Unsent status.
1. Go to the Products tab and follow the steps in the Create PO section of this article.
2. Ordoro will continue to add items to an Unsent PO for a supplier until it is marked as Sent.
How to send the PO to the supplier
Once the PO is finalized, you can email it to your supplier from Ordoro.
Tip: To see how the email will appear, see this section.
Option 1: How to email one PO to your supplier
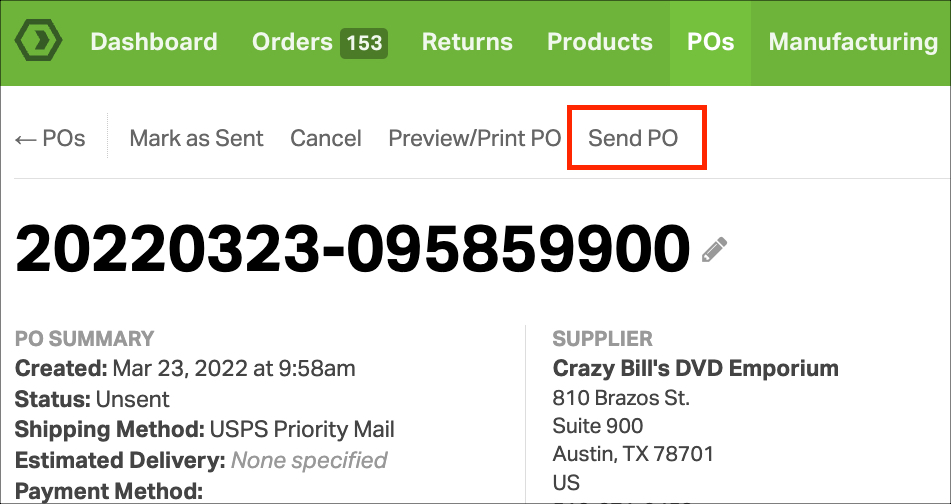
1. Go to the POs tab and click on the PO ID. This will take you to the PO Detail page.

2. Review your purchase order before clicking Send PO. This will email your supplier the PO and change the PO status from Unsent -> Sent.
- The email subject line will be: PO #[your id] from [Your Company Name]
Option 2: How to email multiple POs at one time
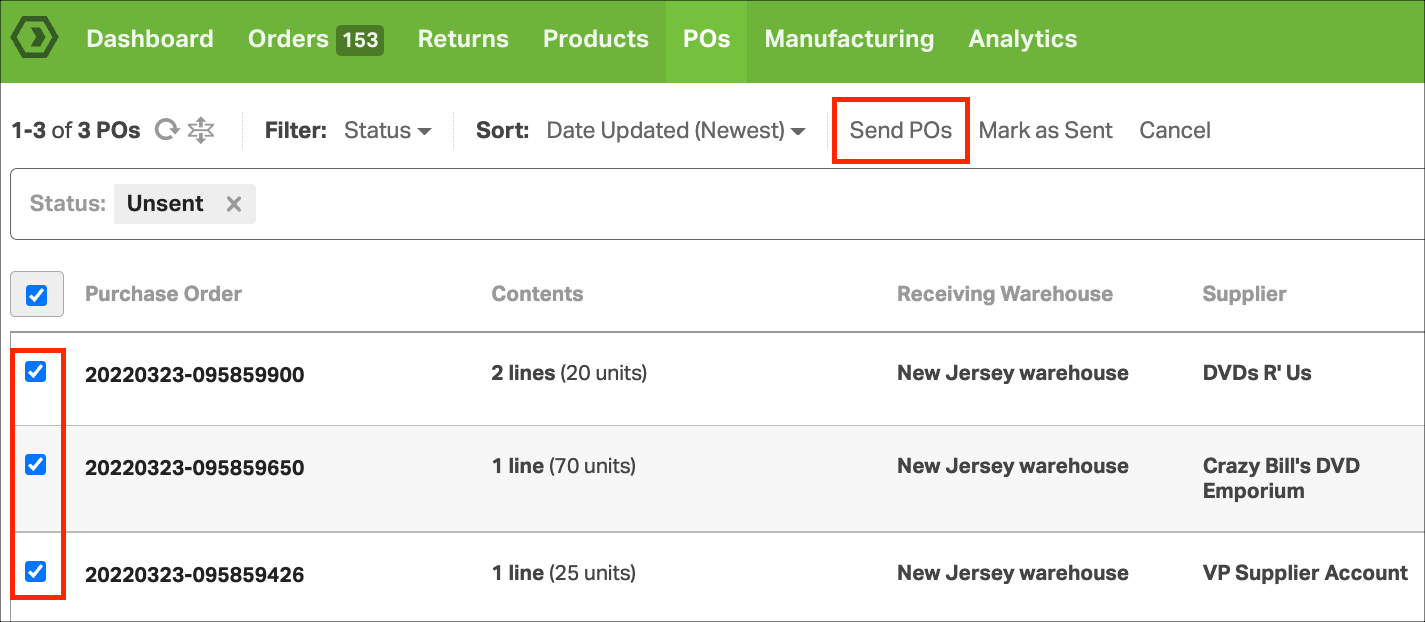
1. On the POs tab, select the checkboxes next to the POs to email. Then, click Send PO.
2. Each PO selected will be emailed to the corresponding supplier. You can send multiple POs to different suppliers at once. It also will update the PO statuses from Unsent -> Sent.
- The email subject lines will be: PO #[your id] from [Your Company Name]
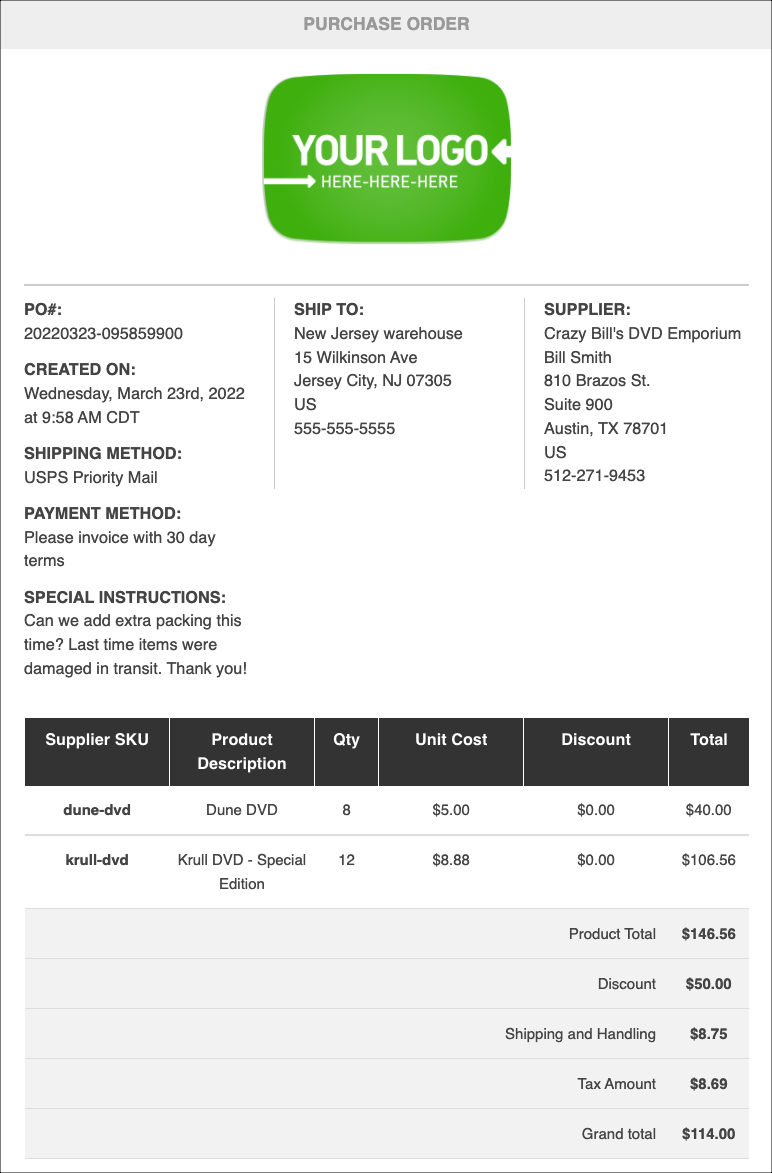
How the PO email appears to your supplier
See below how to preview the purchase order before sending it to your supplier.
1. Go to the POs tab and click on PO ID. This will take you to the PO Detail page.
2. Select Preview/Print PO.
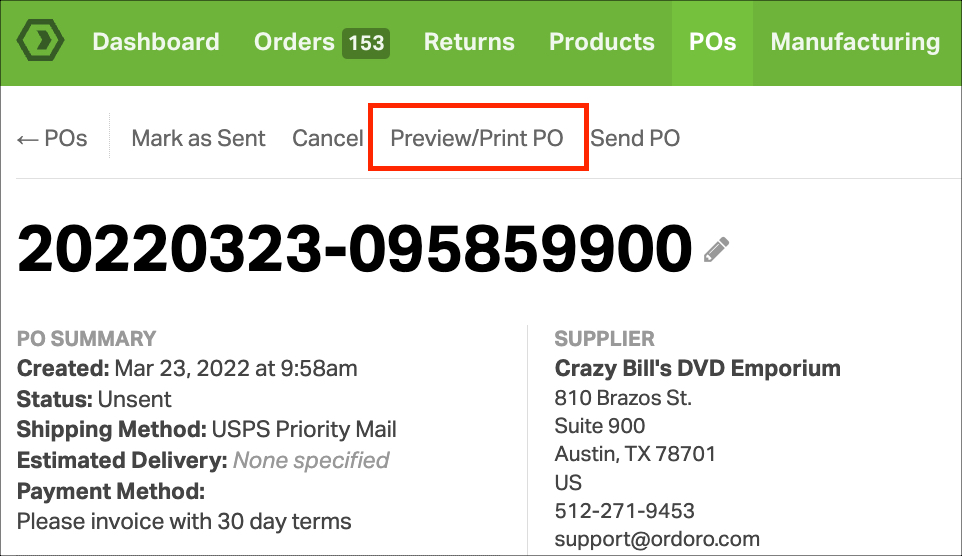
3. A new tab will open in your browser displaying the PO. See an example below.
- When the PO is emailed, the subject line will be: PO #[your id] from [Your Company Name]
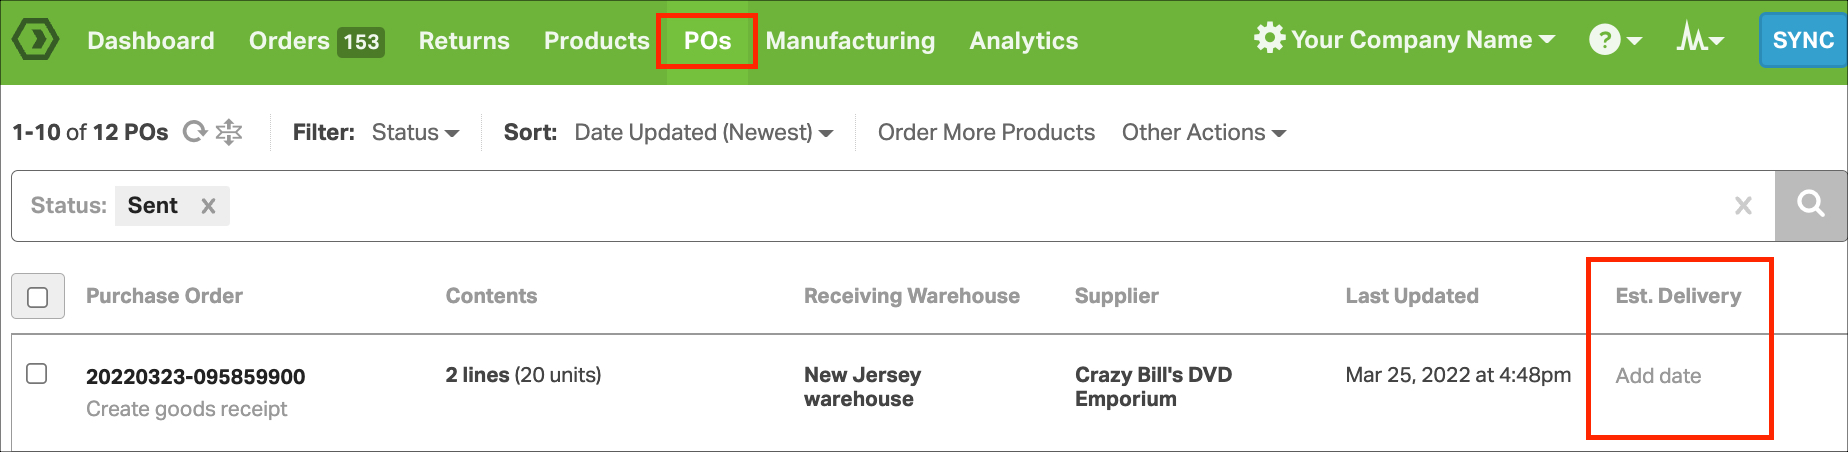
How to update the Estimated Delivery Date
Once the supplier receives the PO, they set an ETA for the shipment. You can save the date in Ordoro and sort your POs by the estimated delivery date.
1. Go to the POs tab and find the PO to update.
2. Select Add date in the Est. Delivery column.
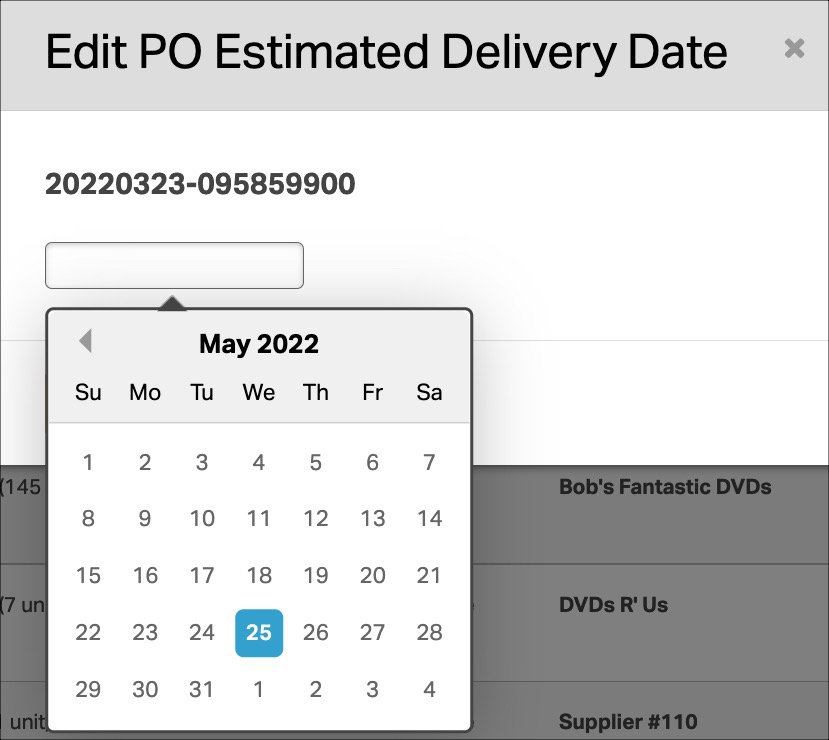
3. Enter the date when you expect delivery. Click Save.
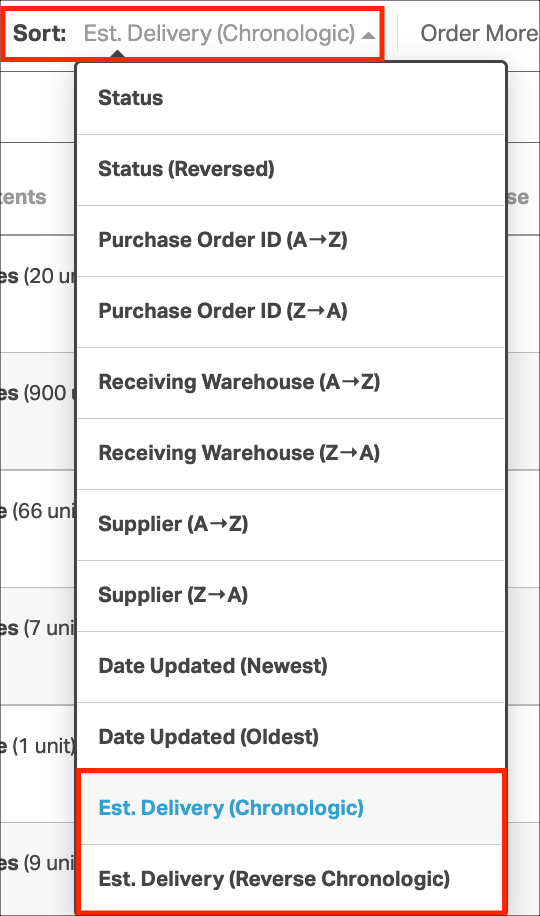
4. Then, your POs can be sorted by this date. This helps anticipate when to receive items and have staff available for restocking.
How to receive items and increase inventory
Once your supplier ships the items to you, you can mark the PO as Received and create a goods receipt. The goods receipt will close out the PO and update your inventory quantities.
1. Go to the PO Detail page. Select the Goods Receipts tab -> Add a Goods Receipt.

2. To mark products as received either:
- Manually enter the quantity received per product
- Scan the barcodes on the items, and Ordoro will auto-fill the quantity
3. Click Save once complete. This will increase the physical on hand quantities for the received products.

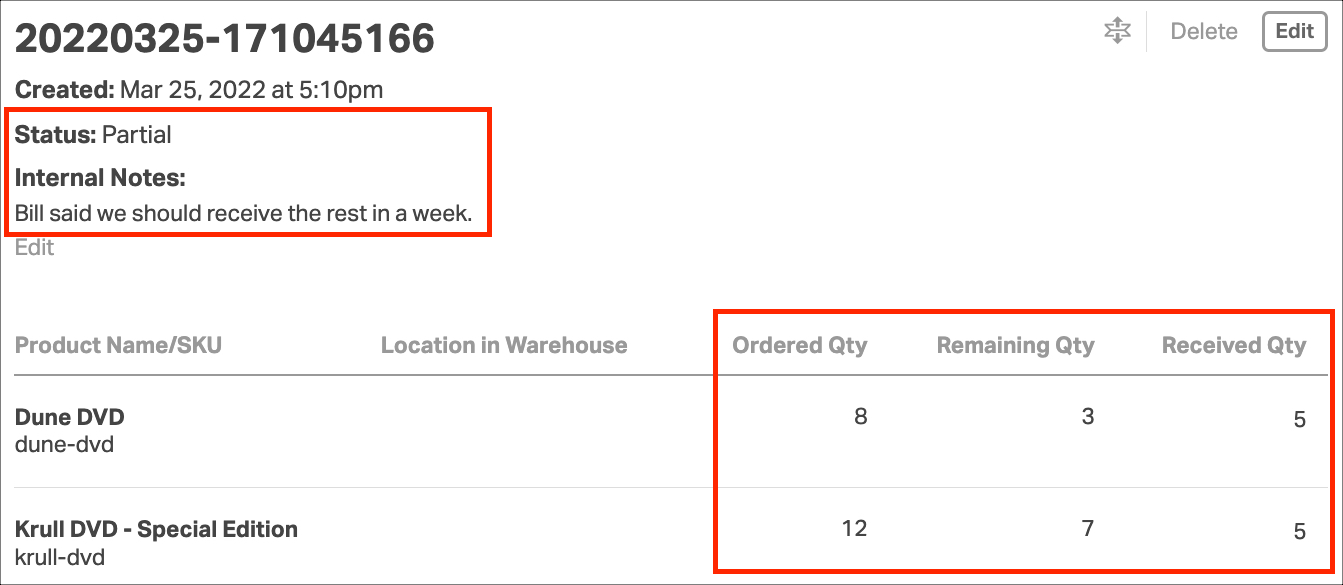
4. A record is created listing how many were received, by whom, and on which date. You can also add an Internal Note specific to the goods receipt with any notes.
In the example below, we received only some of the ordered goods. This changed the PO status to Partial.
Once we receive the remaining products, we’ll create a new goods receipt and enter the quantities. After all items are received, the PO status will change to Received.